整体方向
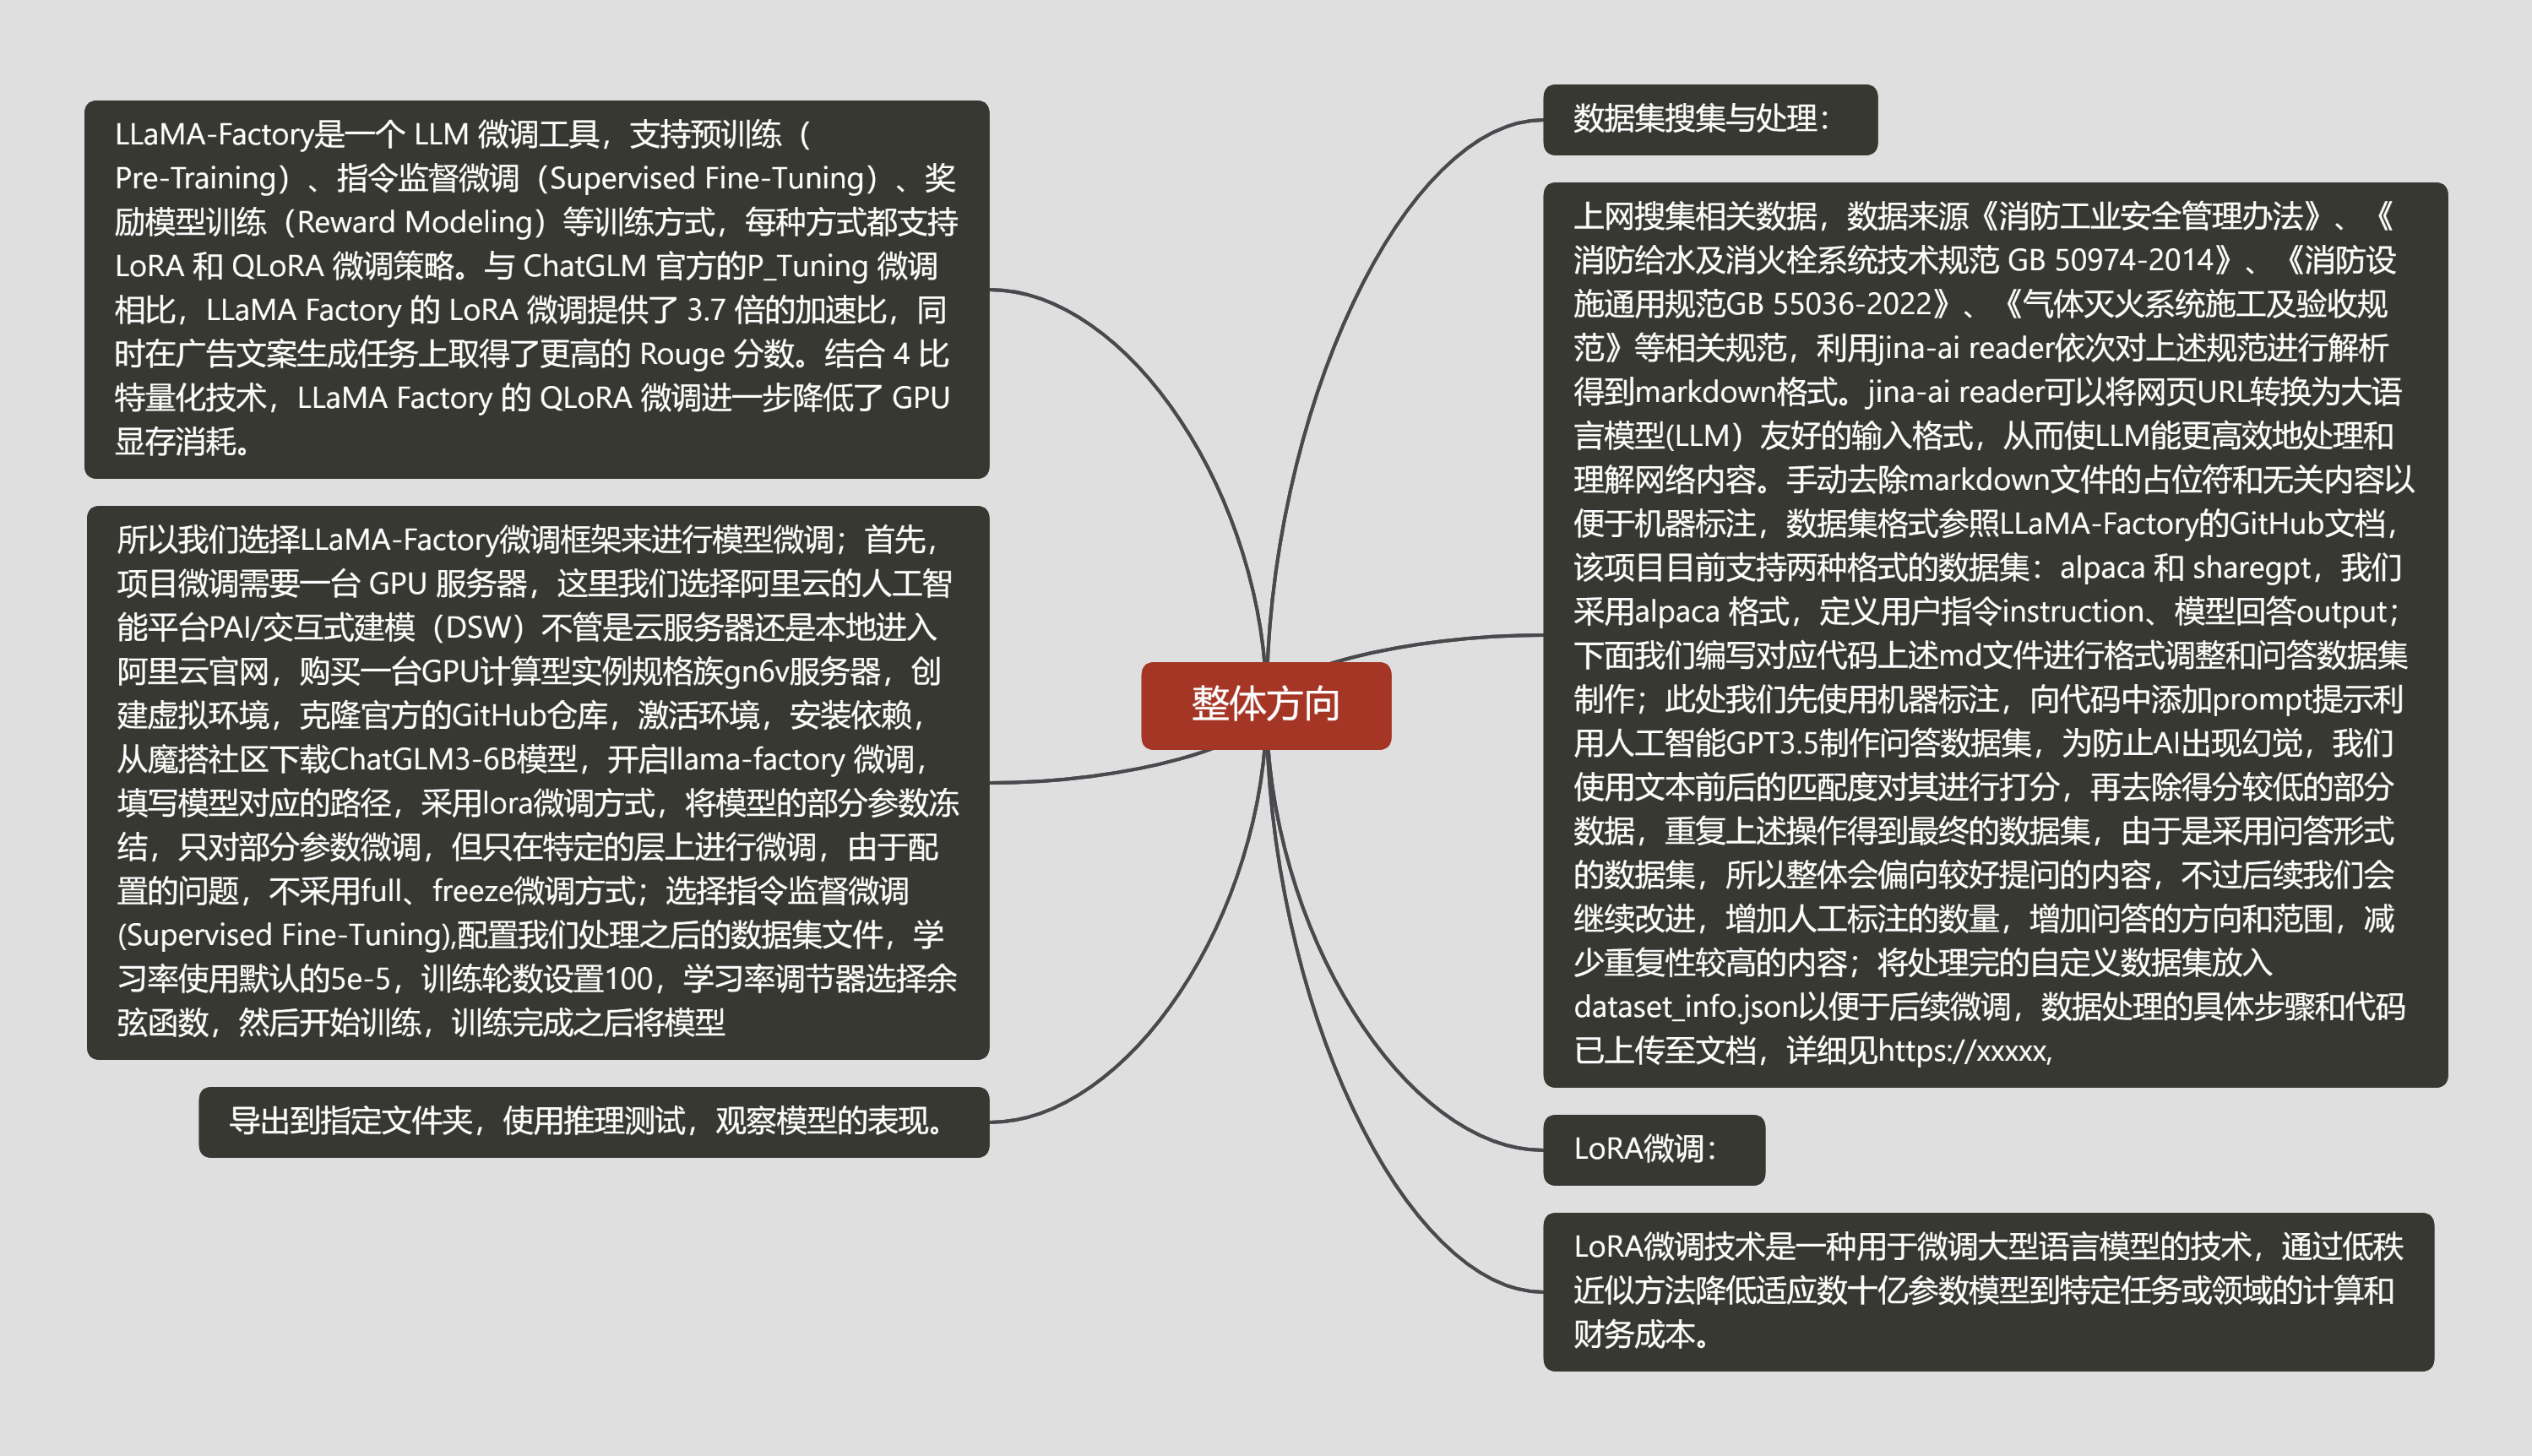
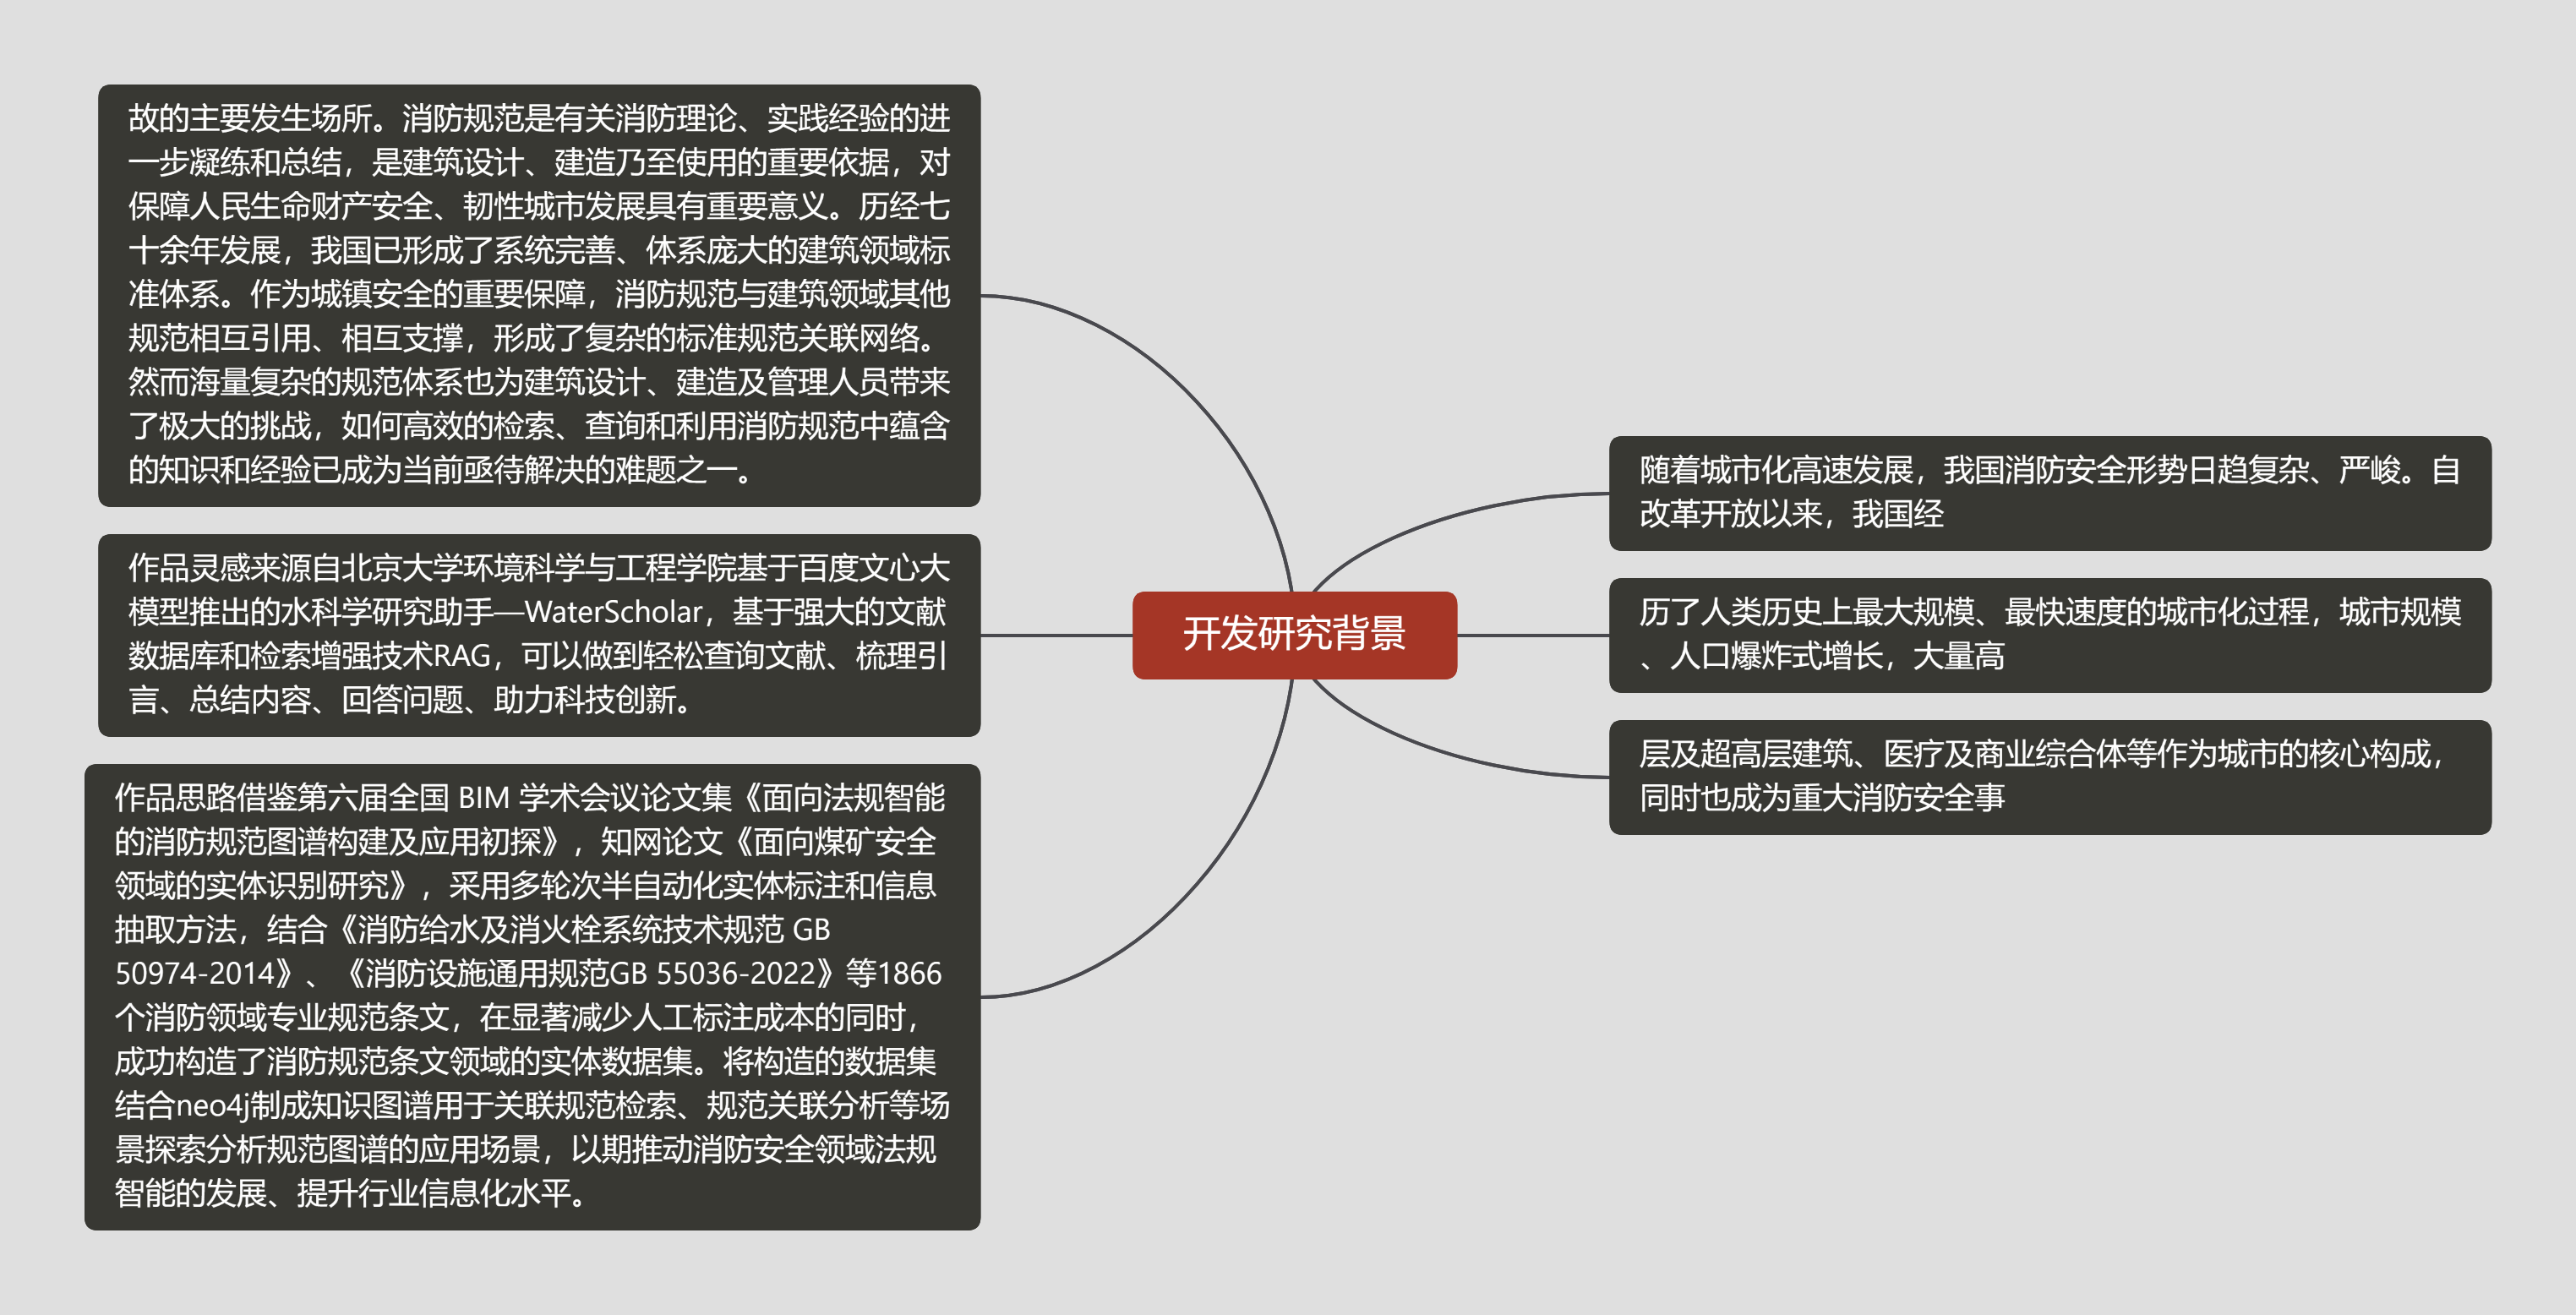
开发研究背景
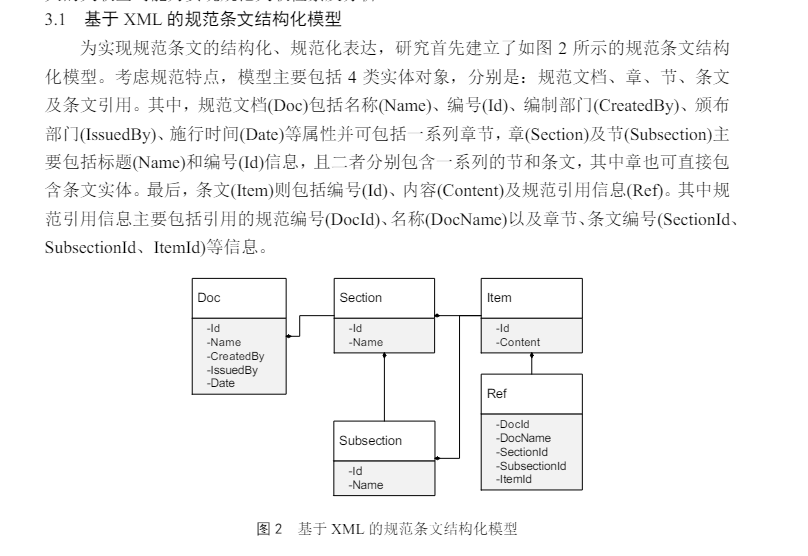
细节展示
部署过程中的主要操作与踩坑记录
- langchianchatchat+chatglm3-6b+bge-large-zh-v1.5
python
conda create -n llmchat python=3.11
conda activate llmchat
python
# 拉取仓库
git clone https://github.com/chatchat-space/Langchain-Chatchat.git
# 进入目录
cd Langchain-Chatchat
bash
# 安装全部依赖,为了提升速度修改为国内的源
#需要进入requirements.txt去修改streamlit版本,修改成1.28.0
'''
如果安装了,
pip uninstall streamlit
pip install streamlit==1.28.0
'''
python
pip install -i https://pypi.tuna.tsinghua.edu.cn/simple -r requirements.txt
pip install -i https://pypi.tuna.tsinghua.edu.cn/simple -r requirements_api.txt
pip install -i https://pypi.tuna.tsinghua.edu.cn/simple -r requirements_webui.txt

or
pip install -r requirements.txt
pip install -r requirements_api.txt
pip install -r requirements_webui.txt
# 默认依赖包括基本运行环境(FAISS向量库)。如果要使用 milvus/pg_vector 等向量库,请将 requirements.txt 中相应依赖取消注释再安装。
#cd ../ 到root目录下
git lfs install
git clone https://www.modelscope.cn/ZhipuAI/chatglm3-6b.git
#git clone https://www.modelscope.cn/AI-ModelScope/bge-large-zh.git
git clone https://www.modelscope.cn/AI-ModelScope/bge-large-zh-v1.5.gitpython
cd Langchain-Chatchat

python copy_config_example.py

cd Langchain-Chatchat/configs/model_config.py
bash
#修改路径,
'''
第6行和d第9行暂时不用修改,不用修改
29可改,
156和159要改其一,我该159行,因为我用的是bge-large-zh-v1.5,你要是用的是其他的就该其他的对应的位置
172要改成chatglm3-6b的文件夹位置
其他的后续再看
然后直接运行
python startup.py -a
'''
### 微调部分的主要操作与踩坑记录
- 隔离环境很必要
```python
git clone https://github.com/hiyouga/LLaMA-Factory.git
conda create -n llama_factory python=3.10
conda activate llama_factory
cd LLaMA-Factory
#老版本用的 pip install -r requirements.txt,我也感觉这个更好一些
pip install -e .[metrics]bash
- 数据集准备
- 进入data/dataset_info.json,添加self_cognition.json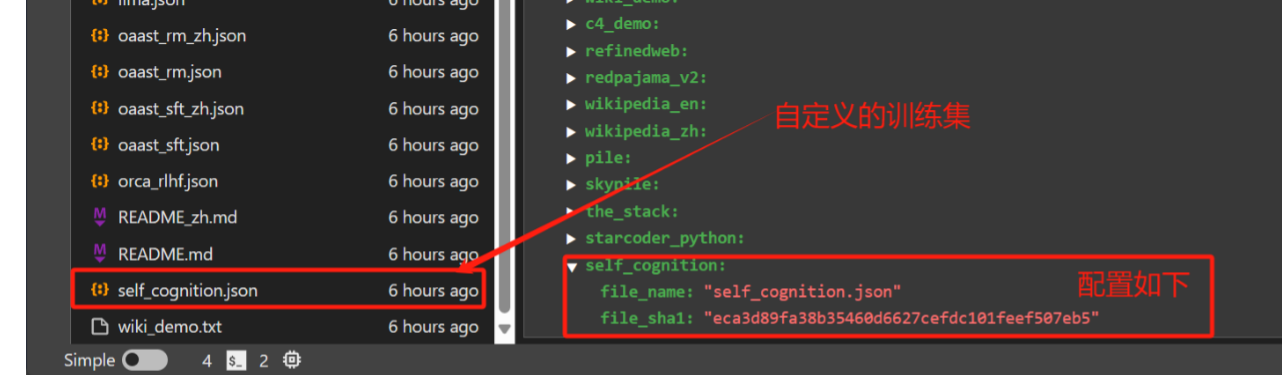
file_sha1获取:新建一个sha1.ipynb文件,改一下file_pathpython
import hashlib
def calculate_sha1(file_path):
    sha1 = hashlib.sha1()
    try:
        with open(file_path, 'rb') as file:
            while True:
                data = file.read(8192)  # Read in chunks to handle large files
                if not data:
                    break
                sha1.update(data)
        return sha1.hexdigest()
    except FileNotFoundError:
        return "File not found."

# 使用示例
file_path = './Desktop/self_cognition.json'  # 替换为您的文件路径
sha1_hash = calculate_sha1(file_path)
print("SHA-1 Hash:", sha1_hash).Tt7JgNTC.png)
利用 LLaMA Board 可视化界面训练(由 Gradio 驱动)
- 阿里云用户指南,这个点还是很重要的,不设置的话显示界面有问题,因为我使用的是阿里云dsw
如果您在阿里云上使用 LLaMA Board 时遇到显示问题,请尝试在启动前使用以下命令设置环境变量:
export GRADIO_ROOT_PATH=/${JUPYTER_NAME}/proxy/7860/python src/train_web.py- 导出模型
训练结果: LLama-Factory/saves/ChatGLM3-6B-Chat/lora/train_2024-05-01-23-23-24 融合结果: /mnt/workspace/trainmodel/01
- 检测模型
.Dw2CHsFm.png)
.QewkpBCq.png)
- 更加详细的内容可以看官网信息
https://github.com/hiyouga/LLaMA-Factory/blob/main/README_zh.md
数据处理部分主要操作与踩坑记录
markdown
#收集规范pdf和网页链接,使用jina-read-api读取文本内容
#文本分割,利用gpt3.5提取信息制作QA问答对,具体代码之后会整理上传至GitHub- 数据这一块耗时很久,不说了全是泪,不过之后的过程确实省了很多麻烦
.gEhZnVbB.png)
.fMHkyuxL.png)
.Gq5FVeqB.png)
.Wyz_9ov1.png)
.dsm9ovhE.png)
.D5-b5e51.png)
效果展示
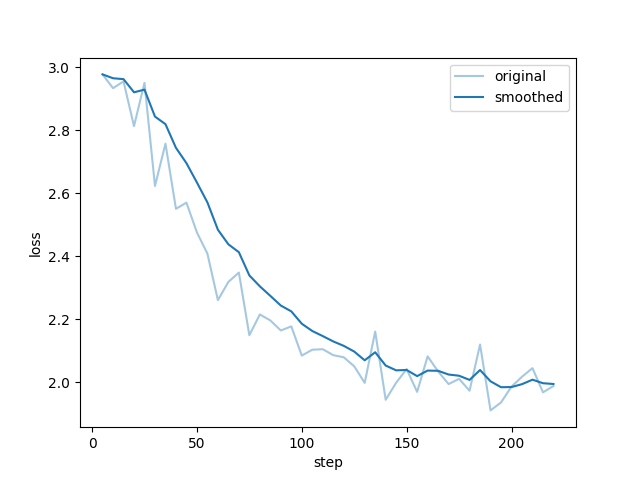
- lora微调后的损失曲线,拟合还算正常,部分截图没有保存
.DpGP1sru.png)
- 对话过程中截的一些图,效果还不错,后续加入知识图谱效果会更好
.DyXzNAuq.png)
.bQewNoQs.png)
.Bq5reHS4.png)